The Best Way to Flush Your Outboard After Saltwater Use
Why flushing matters, and a clear step-by-step guide to protect your outboard from corrosion and salt buildup.

Why you should flush your outboard
Saltwater is corrosive — it eats at metal, blocks cooling passages with salt deposits, and shortens the life of your outboard. Flushing with fresh water removes salt from the water pump, cooling passages and external surfaces, helping prevent overheating, pitting and corrosion. It only takes a few minutes and is one of the best ways to keep an outboard running reliably.
What you’ll need
- Garden hose with a steady freshwater supply
- Flushing muffs (earmuff-style flushers) or a transom-mounted flushing adapter — useful if you don’t want to run the engine in the water.
- Bucket (for muffs method if using a bucket)
- Disposable gloves and goggles (recommended)
- Corrosion inhibitor/spray for post-flush protection (optional)
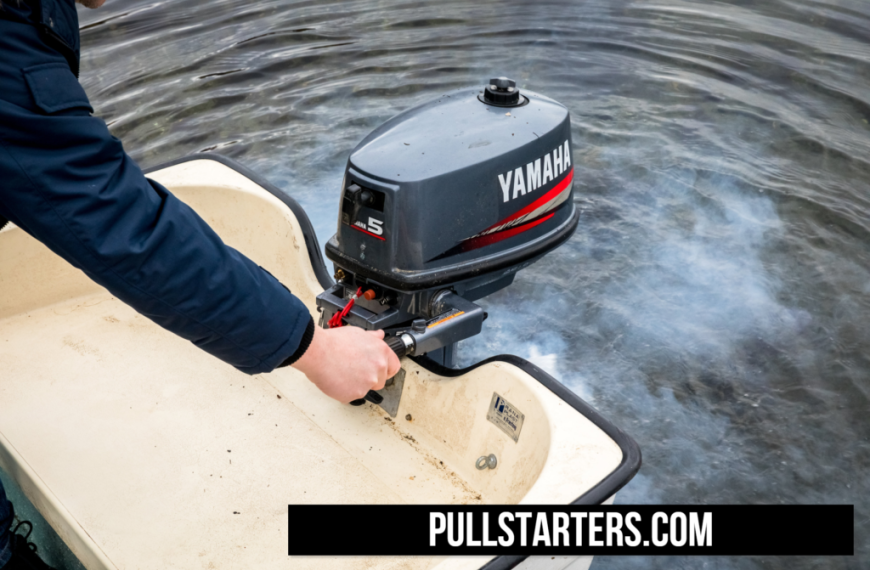
Method A — Easiest: Flush using the boat in the water (if you’ve just come ashore)
Step 1 — Rinse the outside:
Before touching the motor’s water intakes, give the exterior a quick salt rinse with the hose to remove loose salt and crust. This reduces grit getting into the lower unit when you run it.
Step 2 — Run the engine in neutral:
With the engine in the water, start it and allow it to reach normal operating temperature for a few minutes. Run at idle or slightly above (follow your owner’s manual). Fresh water running through the cooling system from the surrounding water will help. After that, while still in the water, use a hose to gently rinse the lower unit, propeller and water intakes.
Tip: If you used fresh water to rinse the outside already, make sure you don’t clog the intakes with debris — keep the hose flow moderate and avoid spraying dirt into the inlet grilles.
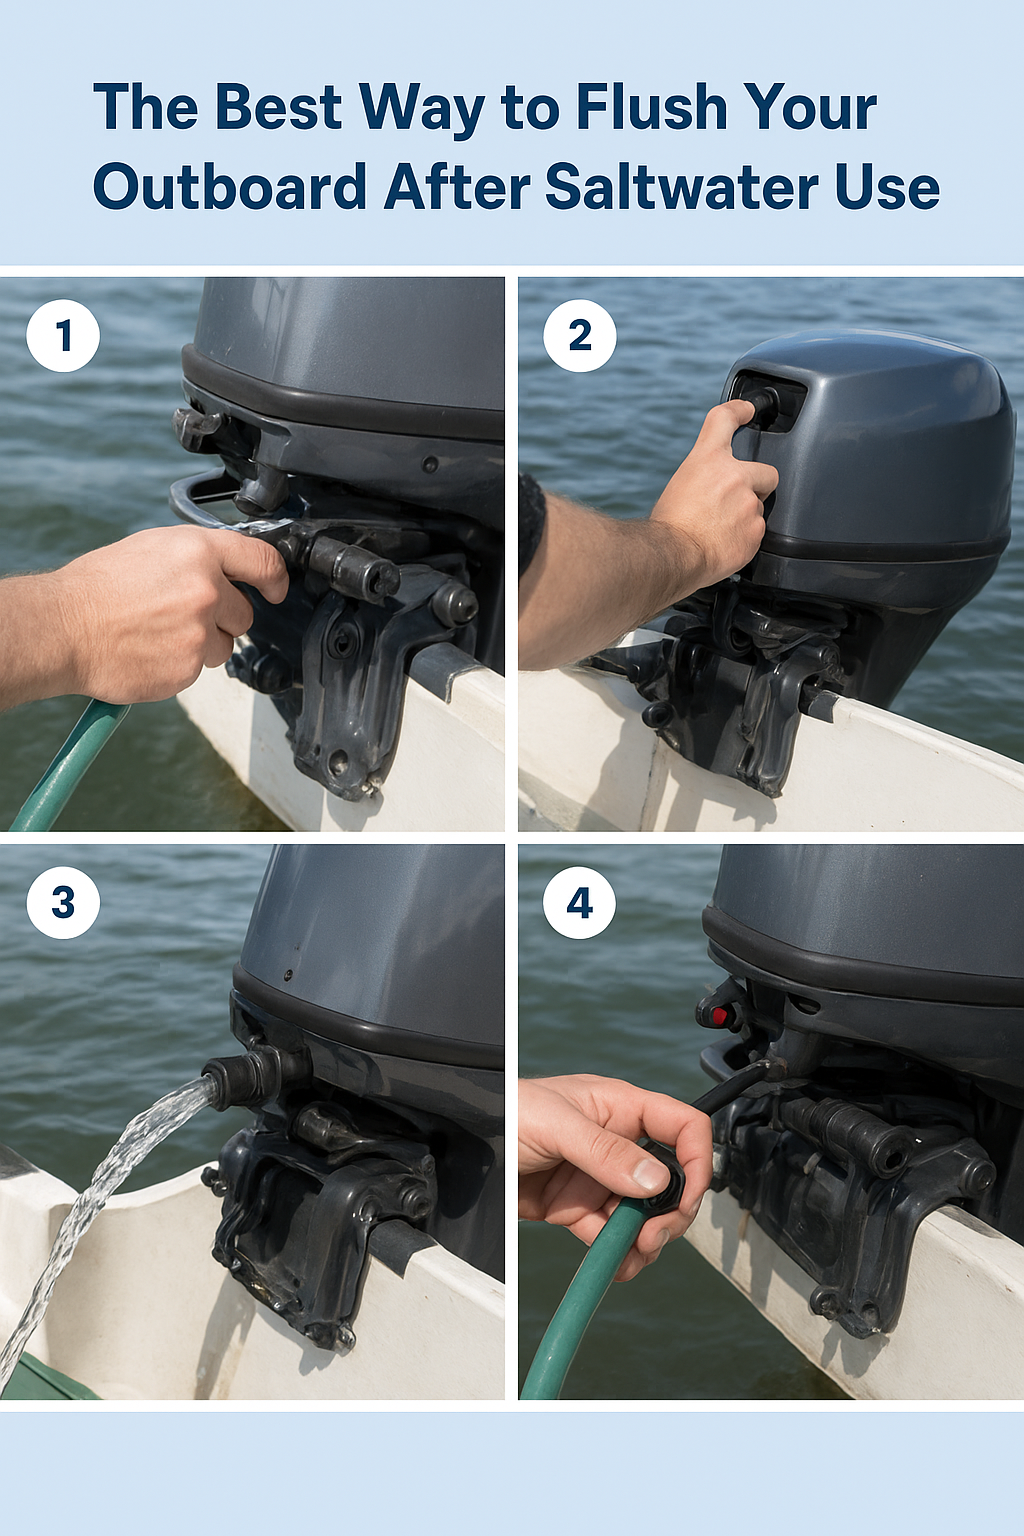
Method B — Best for shore-side flushing: Flushing muffs or flushing adapter
When your boat is on a trailer or you’re on a mooring and want to use tap water, flushing muffs or a transom adapter are the safest options.
Step 1 — Attach the flushing muffs or adapter:
Fit the rubber muffs over the water intake(s) on the lower unit. If you have a transom adapter that screws into the anti-ventilation plate or connects to the motor’s flush port, use that instead. Ensure a snug seal.
Step 2 — Turn on the freshwater supply:
Turn the hose on to a gentle steady flow so water feeds through the muffs into the intake. Avoid very high pressure — you don’t need a torrent, just a steady supply.
Step 3 — Start the engine carefully:
With the motor tilted down slightly so the water flows correctly, start the engine and keep it in neutral. Run for 3–5 minutes. You should see a steady stream of fresh water exiting the tell-tale/indicator — that shows cooling water is flowing.
Step 4 — Shut down and disconnect:
Turn off the engine, stop the water supply, then remove the muffs/adapter. Wipe down the exterior and lower unit with fresh water to remove remaining salt.
Important safety note: Never run the engine for more than a short period while out of the water unless you are using a proper flushing device that supplies sufficient cooling water to the pump. Running an outboard without adequate water flow can quickly overheat and damage the motor.
Method C — DIY bucket flush (when you have no muffs)
- Fill a large bucket with fresh water.
- Position the lower unit in the bucket so the intake ports are submerged.
- Start the engine briefly and run at idle — rotate steer/trim as needed to keep the intake submerged. Run for 3 minutes or until the water exiting is clear of salt residue.
Note: This is less reliable than muffs because it’s easy to let the intake get too close to the surface and suck air. Use with care.
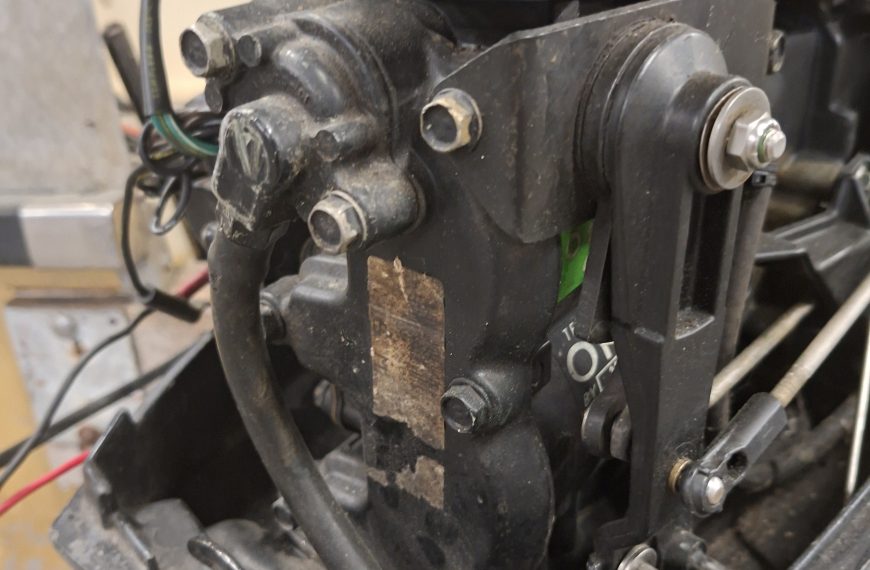
Post-flush checklist (do this every time)
- Wipe the engine down with fresh water and dry with a clean cloth.
- Spray exposed metal and linkages with a light corrosion inhibitor or protective grease (follow your outboard manufacturer’s recommendations).
- Check for leaks, drips, or salt crystals around clamps and connectors.
- Inspect the propeller and anodes; replace sacrificial anodes if heavily corroded.
- If you won’t use the engine for more than a month, fog the engine cylinders with fogging oil per the manual and store per manufacturer’s guidance.
Troubleshooting
- No water coming from tell-tale: Check hose/muffs for a leak, ensure engine is tilted correctly and not drawing air, and verify the tell-tale isn’t blocked.
- Engine overheats after flushing: Could be a blocked water pump or internal salt build-up — have cooling passages inspected and the impeller checked/replaced if needed.
- White crusty deposits remain: Remove with a mild descaler or a vinegar solution, then rinse thoroughly and apply corrosion protection.
How often should you flush?
Flush after every saltwater trip if possible. At a minimum, flush once per week during periods of regular saltwater use — frequent flushing greatly reduces long-term corrosion.
Written for Boatsy by Colin — practical tips for small boat owners

 By
By